Saturday, October 30, 2010

{Recipes} Pumpkin Chocolate Chip Cupcakes


Here's one of my new fall favorites...Pumpkin Chocolate Chip Cupcakes. I found this recipe on Katie Grace Designs blog a while ago and loved the sounds of it. I just finally had the chance to get reacquainted with my kitchen this morning while Dean was napping and whipped these up! Mmmmm....LOVE!

Ingredients:
~ 1 cup all-purpose flour
~ 3/4 cup whole wheat flour ****I did not have whole wheat flour on hand so I substituted with all-purpose flour****
~ 1 tsp baking powder
~ 1 tsp baking soda
~ 1/2 tsp salt
~ 1/2 tsp ground cinnamon
~ 1/4 tsp ground nutmeg
~ 2 eggs, lightly beaten
~ 1 cup canned pumpkin
~ 1/2 cup vegetable oil
~ 1/2 cup honey
~ 1/3 cup water
~ 1/2 cup chopped walnuts
~ 1 bag miniature chocolate chips

FROSTING:
~ 1 (8 ounce) package cream cheese, softened
~ 1/4 cup butter or margarine, softened
~ 1 tsp vanilla extract
~ 2 cups confectioners' sugar
****I used Betty Crocker's cream cheese frosting instead of making my own. Because time is not a friend of mine these days, this was much easier and saved me loads of time.****


Directions:
1. In a large bowl, combine the first seven ingredients.
2. Combine the eggs, pumpkin, oil, honey and water in a seperate bowl; mix well. Stir into dry ingredients just until combined; fold in walnuts and chocolate chips.
3. Fill greased or foil-lined muffin cups three-fourths full. Bake at 350 degrees F for 20-25 minutes or until a toothpick comes out clean. Cool for 10 minutes before removing from pans to wire racks to cool completely.
4. For frosting, in a small mixing bowl, beat the cream cheese, butter and vanilla until fluffy. Gradually beat in confectioners' sugar until smooth. Frost cooled cupcakes.

ENJOY!

I'm off to enjoy the rest of this beautiful weekend, and for the first time since school started in September, I have absolutely NO PLANS. I'm loving it!

Thursday, October 28, 2010

{DIY} Sparkly Spiders


Here's a quick, last minute tutorial for the sparkly spiders I made to decorate my W&W dessert table last weekend. These are super simple and would be a fun Halloween"ish" craft project to do with the kiddies.


Materials Needed: Sparkly stems {aka pipecleaners}, sparkly craft balls, scissors, needle & thread or glue {I bought my stems and craft balls in the dollar bins at JoAnns}.

Step 1: First, I took two craft balls and using a needle and thread, I stitched them together {not pictured}. If you're working with kids, gluing them together might be easier and safer, just allow time for drying before moving on to step 2.

Step 2: Snip one stem in half so that you have two smaller stems, equal in size.


Step 3: Bend the stem and wrap it around the center of the two craft balls, or the body of the spider.


Step 4: Repeat step 3 with the second stem.


Step 5: Bend the stems slightly to shape the legs of the spider. ****You could always add a few more stems to give the spider more legs.****

There are so many cute ways you could use these sparkly spiders. Just to name a few:
~ Halloween/party decorating
~ Attach a magnet and hang on your refriderator
~ Decorate a little girl's headband
~ Make a pin

And the list goes on and on!

COMING SOON:
***Thanksgiving invites/wrap labels
***Thanksgiving tablescape & menu details
***Party styling for Nicole's Baby Shower
***Tortellini, Spinach & Tomato Soup {this might be my fav!}
***Pumpkin Chocolate Chip muffins
***Small kitchen project {almost done convincing Bo ;-}
***GIVEAWAY...STAY TUNED!!!***

Tuesday, October 26, 2010

{Recipes} Sweet Potato & Apple Casserole


Are you ready for another dose of deliciousness? This recipe is brought to you compliments of Kathy Virginia {aka...my Mama}! She is my favorite little cook, and she gave me this recipe to pair with the pork roast I served for my W & W dinner party this past weekend. Some of my guests asked if I would post this, so here it is!

Ingredients:
~ 6 sweet potatoes {nuke in micro until ~ 3/4 done and then peel and slice into 1/4 inch slices}
~ 4 Granny Smith apples {or another snappy, crisp apple}, peel and slice
~ 1 1/2 cups OJ
~ 1/2 cup sugar
~ 1/4 cup brown sugar
~ 3 tbsp flour
~ 1/2 tsp cinnamon
~ 1/4 tsp nutmeg
~ 1/4 tsp salt
~ 1/2 cup butter {1 stick}, divided
~ 1 cup chopped pecans
****Optional****
~ 1 package Pillsbury pie crust {I used Pillsbury cresent rolls instead b/c that's what I had on hand}

Directions:
1. In a greased 9x12 pan, layer the sweet potatoes and apples.
2. Mix the OJ, sugars, flour, spices, and salt and pour over sweet potatoes and apples.
3. Dot with 6 tbsp butter
4. Sprinkle pecans on top
****Optional****
5. Lay out Pillsbury crust and using cookie cutters, cut out little shapes {I used stars, my mom is cuter and uses leaves}. Place the shapes on top of casserole {scatter around}. Brush the dough with melted butter and sprinkle the tops with sugar.
6. Bake on 350 degrees for approximately 45 minutes {should be hot and bubbly}.

This would make for a perfect addition to any Thanksgiving menu! ENJOY!

Sunday, October 24, 2010

{Parties} Wigs & Wine


Wigs & Wine turned out to be a great night filled with good food, good friends, good wine & fabulous WIGS! Join me as I share the party details:

My dessert table :: I absolutely adore putting together a dessert spread. For me, it is the focal point of a party. I had a blast planning this table, which included festive little desserts that were easy to eat and looked adorable. I used the buffet in my dining room to house the spread.


I made "Witch Skewers" that were inspired by Pizzazzerie. These looked so cute and were just as yummy; however, I will admit that they were a major pain to put together.

***I made the purple filler in the tins that held the skewers by running purple tissue paper through my paper shredder. I then took scissors and chopped through the strands a little more. Easy and inexpensive fix!***


One of my very fav desserts this fall has been Rita's pumpkin pie gelati. Before Rita's closed for the season, I bought a quart of their pumpkin pie water ice that I paired with vanilla ice cream to make "Gelati Shooters." I made these in shot glasses with tiny spoons that I ordered from Etsy.


Nothing screams fall more than a caramel apple taffy, so they were a perfect addition to my table as well.


Our local Amish market makes miniature whoopie pies in pumpkin and chocolate flavors. They are so good! I also made red velvet cookies and piped cream cheese icing on top. I stacked three different sized cake plates that I have collected over the years and created a tower to hold these desserts. I love white dishes, and they especially pop against the black buffet table.


The little sparkly spiders I made earlier in the week also decorated my dessert table.


Also inspired by Pizzazzerie, I decorated Reeces cups with the word "Boo" written on them. These were super easy and really cute.


In addition to all of the desserts, I had to add some Halloween candy. I used my glass apothecary jars to hold the sweets.


I used little tealights to add some subtle light to the entire area and also added a sparkly black candelabra to the middle of the spread to anchor the table.


Favors :: I bought little pumpkins, which I jazzed up with some ribbon and arranged on a plate tower. On the sides of the tower, I tied little thank you tags that I made with fun ribbon.

Onto the food and other decor...


I wanted my Wigs & Wine dinner party to be small and intimate, so that our guests could relax and talk to one another over a good meal. What inspired the color palette of orange, lime, purple, and black was this fabric I spotted at JoAnn's weeks before I even planned on having a party. I ended up using that fabric to make a runner for my dining room table. No sewing necessary...I just simply folded the edges under and voila!


I also purchased another fabric in the same color scheme to place on my kitchen island, which is where our guests munched on some appetizers before the meal was served.


I had a lot of fun with these apps! I made "Mummy Dogs" using capers as eyes and...


...I gave fun names to some of the other apps as well. For the "Skulls" I also made matching flag picks.

I completely forgot to takes pics of the dinner, but the menu consisted of:

~ Seasoned Pork Roast {I highly recommend Haines Pork Shop}
~ Sweet Potato & Apple casserole {I will be posting this recipe later this week as per request from my guests}
~ Roasted asparagus
~ Fall salad


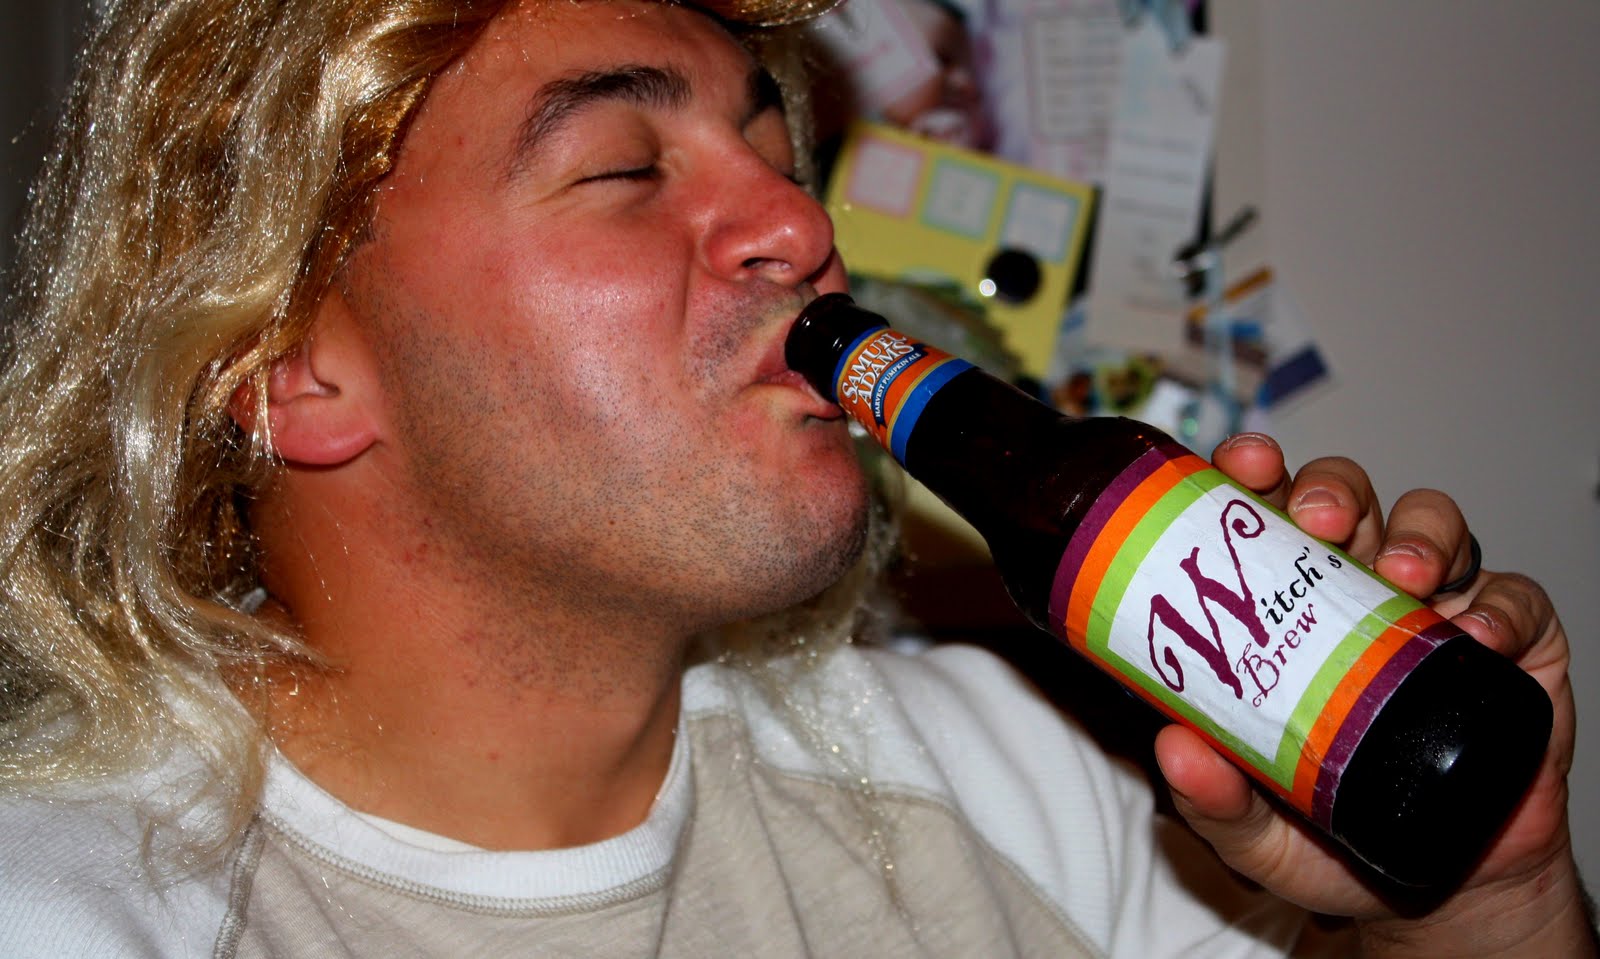
As for the drinks, it was "Witch's Brew" {aka beer} or...


{My husband's buddy Dave was kind enough to pose with one of the beer bottles just long enough for me to snap a shot of the label even though it's a little warped from sitting in ice ;-}


..."Vampire Blood" {aka wine}.


It was an absolutely perfect fall night, so Bo made a firepit fire on our patio.


Ha! The ladies in their wigs!


And the gents...minus Dean {but don't you worry because he wore a wig too!}.


See...told you! {Bo ~ Kate ~ Dean}

My GEM of a husband helped me SO MUCH with this party. He made shopping trips for me, helped with some of the cooking, and even did the dishes after the party was over. Don't know what I do without that amazing man in my life ~ LOVE you, Bo Powell!

Friday, October 22, 2010

{Recipes} Butternut Squash & Sweet Potato Soup


Soup season is upon us and have I got a good one to share with you today! My fellow soup-loving friend, Karen, gave me this recipe yesterday, and I loved the looks of it so much that I literally raced home and threw my kitchen into a tailspin to make it that same day :-} The butternut squash with the sweet potato made for a to-die-for combination, not to mention it was the perfect blend of creaminess. I'm thinking about adding it to my Thanksgiving menu...

Ingredients:
~ 2 tbsp olive oil
~ 1 cup onion, diced
~ 1 tbsp honey
~ 1 large butternut squash {2 1/4 - 2 1/2 pounds}
~ 1 medium sweet potato
~ 1 1/2 cups whole milk
~ 3 1/4 cups water
~ 1 tbsp butter
~ 2 tbsp creme fraiche {I substitued sour cream for this b/c quite frankly I had no idea what creme fraiche was}
~ S&P
*****Optional*****
~ 1 1/2 ounces smoked bacon, cut crosswise into 1/4-inch pieces

Directions:
1. Halve butternut squash lenghtwise, and scoop out seeds. Remove skin using a sharp knife. Cut flesh into 1-inch cubes.
2. Peel sweet potato and cut into 1-inch cubes.
3. Heat olive oil in a stockpot over medium heat. Add onion and saute until translucent {about 3 minutes}.
4. Add squash and sweet potato and cook for 5 minutes. Stir in honey and cook for another 5 minutes. Add milk and water and bring to a simmer. Gently simmer until squash and potatoes are tender {about 30 minutes}.
5. WORKING IN BATCHES, transfer the soup to a blender and puree until completely smooth.
6. Pour soup back into stockpot and bring back up to a simmer. If the soup is too thick, loosen it with water {but so the soup has the consistency of heavy cream}.
7. Taste ~ adjust the seasoning with some salt, a generous amount of black pepper and a bit of honey, if needed.
8. Stir in butter and creme fraiche {or substitute with sour cream}. Turn off heat.
*****Just before serving, saute bacon over medium heat for about 4 minutes, turning to brown all sides. Stir in some creme fraiche and cook for 2-3 minutes longer. Season with pepper. Add to soup. *****
9. Ladle soup into bowls and serve with warm country bread.

TIPS {From personal experience}:
~ Peeling the butternut squash is the most time consuming part {use a very sharp knife or strong vege peeler b/c it took me a while}
~ When transfering soup from stockpot to blender, puree in SMALL BATCHES {I had a mini explosion b/c I was trying to save time and put too much in the blender....lesson learned.
~ I added quite a bit of pepper to this {salt too and a little more honey} to get the taste just right. It tasted a little bland before the seasonings were added.
~ And I added a dallop of sour cream to my bowl of soup before eating b/c sour cream makes everything taste better :-}
~ The next time I make this soup, I will be adding the bacon...I think it will enhance the flavors even more!

ENJOY this perfect FALL soup!

{Crafting} We're EIGHT and Doing GREAT!


My Bubba is 8 months old today. Time is flying and life is SOOO GOOD with this boy. Better than I could ever have imagined it would be! He's hard work, BUT worth every second of it.

I used fabric again for this onesie because I thought making an 8 out of ribbon might be a little tricky with all those curves ;-} As a time saver, I ditched the needle and thread and just hot-glued the fabric onto the onesie. Much easier! I made the little pumpkin on the sign by using a sparkly orange button and cutting a tiny piece of pipecleaner. I made the spider as well and will be posting a quick and easy tutorial next week, just in case you Mamas are looking for some fun craft ideas to do with your babies the week of Halloween.


Can't get enough of his crooked little smile. When he laughs, I laugh!

TGIF!

Wednesday, October 20, 2010

{Sneak Peek} It's no Fun...


...to throw a party and not share some of the fun details ahead of time! This is the last sneak peek before Saturday. I designed some custom wine bottle labels to coordinate with the other details of the night. I'm personally looking forward to drinking a little Vampire Blood on Saturday!

FULL PARTY POST COMING SOON!

Tuesday, October 19, 2010

{Inspiration} Subway Art


I have been seeing subway art on some of the different blogs I visit, and I'm absolutely loving it. I especially love that you can completely customize your subway signs with information that is personal and meaningful to you.


The two pics above {top from Restoration Hardware and middle from KruBooks} show subway art displaying various cities. If there was a city close to your heart, this would be a cool addition to a room in your home. For example, my husband and I were engaged in Baltimore and married in Philadelphia. If I were going to make or buy my own sign, I would include street names, restaurants, places visited, dates, etc. Hmmmm....might be a good anniversary gift!


Look at this adorable spooky subway sign from Tatertots & Jello, my favorite craft blog EVER. {How cute are the rolled flowers?!?}. This particular sign displays all things Halloween, but this could be done for any holiday.

I've even thought about making one down the road for my son's big boy bedroom with his name, birth stats and some of the things he's interested in. Ideas, ideas, ideas!

Monday, October 18, 2010

{Sneak Peek} Mini Desserts


I've been trying to do a little each night to prepare for W & W this weekend, so I'm not rushing on Friday & Saturday. So tonight I started putting together my dessert table and just happened to snap a quick shot of these tiny little spoons I ordered {they are sitting inside a shot glass just to give you an idea as to their accurate size}. Cute, huh!?! They will be accompanying a mini dessert that I will be making for the table. Can't wait to eat one on Saturday...they are my new fav fall treat!

...and MINI DESSERTS are one of my newest obsessions ~ LOVE!

Sunday, October 17, 2010

{DIY} Sparkly Spiders


Just a little peek at my sparkly spiders! I made them this weekend, and they were super simple. Tutorial coming soon {this could be a fun little craft project to do with the kiddies}! You will see these little guys again in the near future {W & W}!

They would have been much more GLAM if I had used black beads....ahhhh....if I only had the time!

Make it a great Monday :-}

Wednesday, October 13, 2010

{HomeGoods} Just Happened to Find...


...a PB Eagan multipanel mirror knockoff! I made a post a few weeks ago about how I had fallen in love with this mirror. After some thought, I kind of decided that I WANTED, not NEEDED it. So, I put it out of my mind until I made a pitstop in the Cape May Courthouse HomeGoods/TJ Maxx about a week ago on a fall beach weekend with my boys. I was looking for a rug for my back porch, not at all intending to buy a mirror, and there it was. Dead center in a sea of glimmering reflections. Staring me square in the face. Calling my name. Only two of it's kind available for purchase. An "almost" exact replica of the mirror I loved. It was meant to be, and it was a STEAL, so I HAD to buy it. You'd have done the same, right?!

Sunday, October 10, 2010

{Autumn} Just a Glance....


...at what FALL looks like in my home. Oh, how I LOOOOVE the fall! And I'm taking advantage of every single second of it with my family so far. I hope you are too!

Thursday, October 7, 2010

{Nursery Wall Art} Tyler Emery


I just finished up these nursery signs for a little boy named Tyler. His nursery is beige and green. I thought the chocolate would be a nice contrast to the beige used in the bedding and also compliment the green. Again, ribbon was used to add a little depth and dimension to the sign.

Tuesday, October 5, 2010

{Custom Business Sign} Colorz 4 You


This is a custom sign I am in the process of completing for a friend and her business partner. Karen asked for me to use the bright, fun colors you see above, which play along with the shop's name, "Colorz" 4 You. Once completed, this will end up being a large 20x20 circular sign, which I will attach ribbon to for easy hanging.

Sunday, October 3, 2010

{Baking} Experimenting...


...with cupcake skewers this weekend! And I'm so glad I did a trial run with these things. I made some BIG mistakes that I will not make again...

We were headed over to our friends' house this evening for the Eagles game and dinner. I figured it would be a great time to try out these cupcake skewers I've been seeing everywhere. So, I made the mini cupcakes, piped vanilla icing on top, sprinkled with cookies & cream crumbles and green jimmies {for the EAGLES}, tied some green and black ribbon to the skewer/lollipop stick, and stuck them in their base. All fine until...


...I tried to transport them to G & A's. Ughh...these little guys were not meant to be moved! All the bumping and moving from the drive over and they were a wreck! Some slid down the skewers, others completely fell off. Oh well....you win some, you lose some :-}


I had a little extra batter so I made a few regular sized cupcakes and decided to try the pumpkin look with the orange icing, orange sanding sugar, and a little pretzel as the stem. Kinda cute and really easy!

Saturday, October 2, 2010

{Nursery Wall Art} M.K.H


I just finished some wall art I made for Maura Kate's nursery. My sister used the colors of her sprinkle {dark pink, light pink, turquoise and chocolate brown} to decorate M's nursery. So, I thought it would be cute and different to use ribbon from the sprinkle to embellish her signs. Not only does it give the signs some vibrant pops of color, but it also adds some dimension. I also used a background fill of a very pale pink because M's nursery walls are white. These were printed on shimmery paper for a little added sheen :-}


Working on another set for a friend....they are turning out really cute, too! Will post when finished.