Showing posts with label Recipes. Show all posts

Friday, July 6, 2012

{Holiday} The Fourth


I hope ya'll had a wonderful Independence Day! I was loving all of the cute 4th of July ideas from Pinterest this year and decided to make this little dessert. Brownie fruit kabobs -- yummmm and how simple? Instead of skewers, I slid the berries and brownies on striped and dotty party straws for some added cuteness. I would recommend using larger chunks of brownies as mine were starting to fall apart because of the thickness of the straw.

Although I forgot to snap my own picture, I also made this salad for the 4th {also found on Pinterest}. I wasn't sure if I was going to like the combination of the watermelon and tomatoes, but it was surprisingly refreshing.

**Officially finished with grad school and the newest school counselor on the block {no job but that's on hold anyway b/c of baby #2}! You have no idea how relieved I am and the huge weight that has been lifted from my shoulders. PHEW!
**I celebrated my 35th birthday the day after the 4th of July -- WHAT? WHAT? 35? Where has time gone....?
**TGIF and have a wonderful weekend!

Monday, June 18, 2012

{Recipes} Veggie Stirfry


One of my favorite meals for dinner is a veggie stirfry. My mom used to make them for our family when we were growing up, and now I make them for my own family. Combine the fresh veggies of the summer with chicken or sausage and serve over whole wheat pasta and you have yourself a tasty little meal. Dean loves them too -- notice his little hand snatching some noodles as I was snapping a quick pic -- HA!

Ingredients:
~ 2 peppers, sliced into strips
~ 1/2 onion, sliced
~ 1 zucchini, sliced
~ 1 yellow squash, sliced
~ 1 fresh tomato, chopped
~ Fresh broccoli, steamed {I used leftover from dinner the night before -- frozen would work too}
**Any vegetables work here -- it's a matter of preference
~ Chicken bullion cube combined with about 1/4 cup hot water {this flavors the stirfry nicely}
~ EVOO
~ S & P to taste
~ 1 lb. whole wheat ziti noodles {or any kind you prefer}

Directions:
1. Fill a large pot with water and boil. Then cook your pasta according to package directions. Drain and set aside.
2. In a small frying pan, place your sausage on medium heat, turning every minute or so until mostly cooked all the way through.
3. In a large skillet or wok, place your sliced veggies with a little EVOO over medium heat. Add sliced sausage. Continue to turn the entire mixture for approximately 5 minutes.
4. Next, add your bullion cube with hot water. Bring heat up a little and continue to turn mixture for a few more minutes, making sure veggies do not become soggy.
5. Add a little S & P.
6. Once veggies are cooked through, dump entire mixture over pasta and sprinkle with parm cheese.
7. Serve with warm, crusty bread.
8. YUM & ENJOY!

**I always have tons of leftovers when I make a stirfry -- great for lunches the next day!
**I'm officially OFF FOR THE SUMMER, have one week left of my LAST grad class EVER, and finally getting things done around my house -- feeling refreshed, relieved, and ready to enjoy the summer with my family!
**I hosted a simple Father's Day dinner -- pics & blog post tomorrow.

Tuesday, May 29, 2012

{Recipes} Cheesesteak Pie


For the longest time, my hubby and I would either go out to eat on the weekends or order out to give me a break from cooking. But...we realized quickly that not only was this habit not the healthiest of options, but it also was becoming quite expensive. So, rather than ordering pizza out on Friday nights or ordering take-out on Saturday nights, I have been making my own pizza/other meals. That's not to say we never order out ;-}

Here's a recipe I tried recently {my mom made it first and liked it, so I tried it and liked it as well}. We love cheesesteaks, and this was similiar, but a slightly different take.

::Cheesesteak Pie::

Ingredients:
~ 1 package Old Neighbor shaved meat {Shoprite carries this brand}
~ 1-2 bell peppers {red/green}, diced
~ 1 onion, diced
~ 1 package shredded mozzarella cheese
~ 2 tubes Pillsbury crescent rolls

Directions:
1. Line a greased cookie sheet or pie plate with 1 tube of crescent rolls, pressing seams together.
2. In a frying pan, cook meat, and add peppers and onions.
3. Once mixture is cooked thoroughly, add as much or little cheese as you'd like.
4. Then, pour entire mixture into pie plate.
5. Cover top with the second tube of crescent rolls and press seams around perimeter of pie plate.
6. Bake at 350 degrees for approximately 20 minutes or until crescent roll crust is lightly browned.
7. Serve with ketchup & enjoy!

**I served this meal with homemade potato wedges {dip in ketchup and you get a steak fry feel!}.
**You can also buy reduced fat crescent rolls and cheese for a healthier version of this meal.
**You could also forgo the crescent rolls and just add your meat to rolls for a traditional cheesesteak {they sell shaved pork and chicken as well}.
**12 more days of school but who's counting?!

Thursday, May 3, 2012

{Recipes} Chicken Fajitas


Hi! Here's a simple recipe for ya'll. It's one of my quick & easy go-to meals after a busy day of work and always a crowd pleaser {well, if you'd call my two boys a crowd that is}. These may not technically be "fajitas", but I've never claimed to be a food expert, so that means I'm off the hook, right? Ha.

Chicken Fajitas

Ingredients:
~ Flour tortillas {I use whole wheat}
~ Chicken short-cuts {I like Perdue}
~ 1 green bell pepper, sliced in strips
~ 1 red bell pepper, sliced in strips
~ 1/2 large onion, sliced
~ Grape tomatoes
~ Cheddar cheese
~ EVOO
~ Sour cream & salsa {and any other toppings you might like}

Directions:
1. Place your red & green pepper (sliced in strips) and onion in a large frying pan on medium heat and add about a tablespoon of EVOO.
2. Let your veggies soften a little and then add your chicken. Keep your chicken and veggies over medium heat until veggies are soft and chicken is heated all the way through {I break chicken strips up a little into smaller strips/pieces}.
3. Add grape tomatoes and let those cook for a minute or two.
4. Once your veggie/chicken mixture is ready, turn off heat and sprinkle the entire mixture with cheddar cheese {how much depends on how cheesey you like your fajitas ;-}. Turn mixture over with spoon or spatula and allow cheese to melt all the way through.
5. Place tortilla in heated oven for approximately 2 minutes {or until warm}. Scoop some of your chicken/veggie/cheese mixture into tortilla, top with a little sour cream and salsa.
6. ENJOY!


**This meal took about 20 minutes to prepare -- gotta love that!
**I served my fajitas with Uncle Ben's 90 minute rice {love those packets -- so simple & yummy} and roasted zucchini & squash.

Wednesday, March 14, 2012

{Recipes} Sausage Soup


Considering today is going to be the most GORGEOUS day of the year so far, it's probably not the greatest idea to post a soup. I received the recipe from a girlfriend at work, and I made this hearty meal last week on a cooler day {this is just the first chance I've had to post it}. I served it with crusty bread, had lots of leftovers for lunches, and Dean liked it {Bo too, but he usually likes everything ;-}. That makes it a winner in my book.

Ingredients::
~ 1 lb ground sausage
~ 1 quart water {I used closer to 1 1/2 quarts}
~ 2 8 oz cans Italian diced tomatoes
~ 1 8 oz can Campbell's French onion soup
~ 1 bag frozen green beans
~ 1 bag broccoli slaw {near bagged lettuce in Shoprite}
~ 1 bag tortellini

Directions::
1. Cook pack of ground sausage.
2. Add one quart of water, 2 cans of Italian diced tomatoes, 1 can of Campbell's French onion soup, one bag French cut green beans, and one bag of broccoli slaw.
3. Simmer for about 30 minutes, making sure the veggies have softened.
4. Add tortellini a few minutes before you eat.
5. ENJOY!

Wednesday, January 25, 2012

{Recipes} Lasagna Roll-ups


Good Morning! Since it has become increasingly difficult for me to meet my girlfriends out during the week for girls' nights, I hosted a small dinner at my house last night. Last year, Dean was in bed by 6:30pm, and I could easily put him down and still get to a restaurant by 7pm {every once in a while}. Now, my little sweetie doesn't hit the hay until 7:30-8pm, and after not seeing him all day, I'm reluctant to leave him again until after I put him to bed. Combine that with my hubby's later work schedule and grad school once a week and the girls' nights just aren't happenin'. So, I've had to re-adjust a bit and host my girls at my home.

I decided to make these little lasagna roll-ups...if they're not the cutest darn things I don't know what is {not a great pic...sorry!}. So easy and delicious! I served them with a green salad, crusty bread, red wine & let's not forget dessert...homemade cookie ice-cream sammies {one of my simplest yet most delicious go-to desserts}.

Ingredients:
~ 9 lasagna noodles, cooked
~ 10 oz frozen chopped spinach, thawed and completely drained
~ 15 oz fat free ricotta cheese {I used lite instead of fat-free}
~ 1/2 cup grated Parmesan cheese
~ 1 egg
~ S & P to taste
~ 32 oz tomato sauce
~ 9 tbsp {about 3 oz} part skim mozzarella cheese, shredded

Directions:
1. Preheat oven to 350°.
2. Cook lasagna noodles according to package directions.
3. Combine spinach, ricotta, Parmesan, egg, & salt and pepper in a medium bowl.
4. Ladle about 1 cup sauce on the bottom of a 9 x 12 baking dish.
5. Place a piece of wax paper on the counter and lay out cooked lasagna noodles. Make sure noodles are dry. Take 1/3 cup of ricotta mixture and spread evenly over noodle. Roll carefully and place seam side down onto the baking dish. Repeat with remaining noodles.
6. Ladle sauce over the noodles in the baking dish and top each one with 1 tbsp mozzarella cheese.
7. Put foil over baking dish and bake for 40 minutes or until cheese melts.
**Makes 9 rolls.
8. To serve, ladle a little sauce on the plate and top with lasagna roll.

ENJOY this cozy little meal! It's healthy too!

**Another quick, easy and tasty meal coming soon.
**Recipe via Pinterest...click here for source.

Thursday, December 8, 2011

{Recipes} Turkey Noodle Soup


One of the best parts of hosting Thanksgiving is all the yummy leftovers you are able to enjoy in the days following the holiday. At our house, we make turkey sandwiches, soups, casseroles -- you name it. About a week ago, I used up the last of the leftovers and made a big pot of turkey noodle soup. We have all had colds & coughs in my house {thankfully on the mend at this point} and a mug of brothy soup and bread was just what the doctor ordered. Dean was a big fan too ;-}

Ingredients:
~ 1 cup {1/4-inch-thick} sliced carrot
~ 3/4 cup chopped onion
~ 4 garlic cloves, minced
~ 1 cup {1/4-inch-thick} sliced celery
~ 1/4 teaspoon salt
~ 1/4 teaspoon freshly ground black pepper
~ 6 cups fat-free, low-sodium chicken broth
~ 2 cups {3 ounces} uncooked egg noodles
~ 1 tablespoon low-sodium soy sauce
~ 1 bay leaf
~ 2 cups shredded turkey {about 8 ounces}
~ Coarsely ground black pepper **optional**

Directions:
1. Heat a large saucepan over medium-high heat. Coat pan with cooking spray. Add carrot, onion, and garlic; sauté 5 minutes or until onion is lightly browned.
2. Add celery, salt, and 1/4 teaspoon pepper -- sauté 3 minutes.
3. Add broth, egg noodles, soy sauce, and bay leaf. Bring to a boil. Reduce heat and simmer 5 minutes.
4. Add shredded turkey -- cook 3 minutes.
5. Discard bay leaf.
6. Sprinkle with coarsely ground black pepper, if desired.

**Recipe via Cooking Light.
**I made THIS the other night. So YUM! Not the healthiest dish but worth every calorie and easy to make. I paired with a green salad to balance out the calories ;-}
**So much to share with you and NO TIME to do it :-{ When will life ever slow down?!?!

Tuesday, October 18, 2011

{Recipes} Broccoli, Cheese & Potato Soup


Soup season is upon us, and I have been craving it like never before. Almost everyday for lunch, I bring a crock of homemade soup {not always homemade by me though -- ha!}. My mom's soups have been a favorite of mine for years now, and I love how she passes on her yummy recipes to me {and then I can share them with you!}. Here's the latest ::

Broccoli, Cheese & Potato Soup

Ingredients ::
~ 1/2 stick butter
~ 1 onion, diced
~ 3/4 cup flour
~ 1 46 oz can chicken broth
~ 5-7 red potatoes, diced in small chunks
~ 1 16 oz bag frozen broccoli florets
~ 1 bag shredded white cheddar cheese
~ 1/2 - 1 cup half & half
~ S & P to taste

Directions ::
1. In a large stock pot, saute diced onion in butter.
2. Once onions are soft, add 3/4 cup of flour and stir {mixture will be a little clumpy}.
3. Next add chicken broth and potatoes, bring up to a simmer, and STIR. Continue stirring until mixture is hot and starting to thicken a little bit.
4. Add broccoli and continue stirring. Mixture should be bubbly and hot and the consistency should not be too thick but also not thin.
5. Add S & P to taste.
6. Remove soup from heat and add cheese to taste {I used about half of the bag}.
7. Next add half & half to taste {1/2 to 1 cup depending on how creamy you want it}.
8. Serve with a loaf of warm, crusty bread.
9. ENOY!

TIPS ::

**This soup is slightly high maintanence because it requires constant stirring throughout the entire process {but the end result is worth it}.
**Have all your ingredients ready and prepared before you start {because you will need your hands free to stir the whole time}.
**I got a little frustrated once I added the chicken broth because I thought my soup wasn't thickening. A dose of patience was all I needed because it did eventually thicken -- it just took about 15 minutes of constant stirring and the mixture had to be hot enough.
**From start to finish, this soup took about 45 minutes to an hour to make.
**Remember to take soup off heat once cheese and half & half are added -- half & half can get a little funky if the heat is left on.
**This soup can also be blended in the mixer once finished for those that do not like a chunky soup. I LOVE a chunky soup, so I left mine as is.


Served with a loaf of warm, crusty bread, this was a perfect fall soup for the beautiful fall night we had here in southern New Jersey last night. I have plenty of leftovers for lunch this week too -- my fav!

**I've got a few more KVM {my mama} soups on my radar for the fall -- I will share them once I make and try them myself!

Wednesday, September 7, 2011

{Recipes} Easy Crockpot Chicken


Last night was a perfect night for a cozy crockpot meal. It was raining and chilly, so we cozied up in our little house and feasted on this new crockpot recipe I thiefed from facebook {not kidding -- ha!}. My friend posted a question asking for easy and healthy dinner recipes that her friends use on work nights, and she got a ton of replies. I was loving reading all the replies and yes, I shamelessly stole some of the recipes that her friends listed ;-} So, thank you to the woman that posted this recipe -- it's sooooo easy and was really yummy, although, I'll be honest, it doesn't look all that appetizing in this picture.

Ingredients ::
~ 1 lb boneless chicken breast
~ 1 16 oz. tub light sour cream
~ 1 can cream of mushroom soup
~ 1 packet dry onion soup mix

Directions ::
Throw all the ingredients in the crockpot and stir. Cook on low for approximately 5 hours.

**I served this meal over brown rice and with a green salad and cranberry jelly.

Couldn't be easier for a working mom or any mom for that matter, and the woman on FB said it was an old Weight Watcher's recipe, which means it's healthy too ;-}

Monday, August 29, 2011

{Recipes} Flatbread Pizzas & Chipwich Dessert Sammies


I'm back from vacation, and I think it's safe to say last week was one for the books! Aside from renting homes on the same street as close to 40 family members, and having a wonderful time on the beach each afternoon, we, along with the rest of the East Coast and beyond, experienced an earthquake and a hurricane all within days of one another. Unfortunately, we were evacuated from the Outer Banks two days early due to Hurricane Irene and the impending conditions, but on the bright side, we had beautiful weather all week while there, everyone stayed safe and healthy, and we just enjoyed spending time together. It was a wonderful get-away!

To take some of the burden off my mom, each of my siblings and I play "cook" for one night each. On our designated night, we are responsible for the entire meal -- purchasing and prepping the food, cleaning up the mess, etc. The meal does not have to be anything extravagant, and no one has to spend hours in the kitchen slaving away. With that being said, our meal was super simple. Let me start with dessert...

I used chocolate chip cookies and vanilla ice cream to create chipwich-like dessert sammies, and they couldn't have been easier. I used pre-made cookies from my hubby's company and let my ice-cream soften a little bit. Then I scooped about 2 nice scoops onto one cookie and spread it out as best I could. Taking the other cookie, I created a sandwich and smoothed any ice-cream that ooozed out the sides with a knife. I put them back in the freezer until it was time to serve and eat them. That's it -- done!

**I'm thinking these will be really fun in the fall too -- maybe sugar cookies with pumpkin ice-cream? Or gingersnap cookies with vanilla ice-cream. How about adding some sprinkles around the edges for a little pop of color? The possibilities are endless!


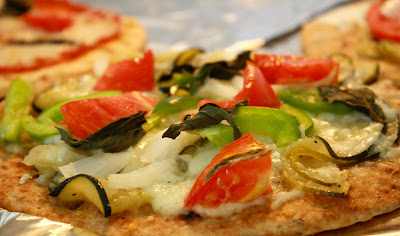
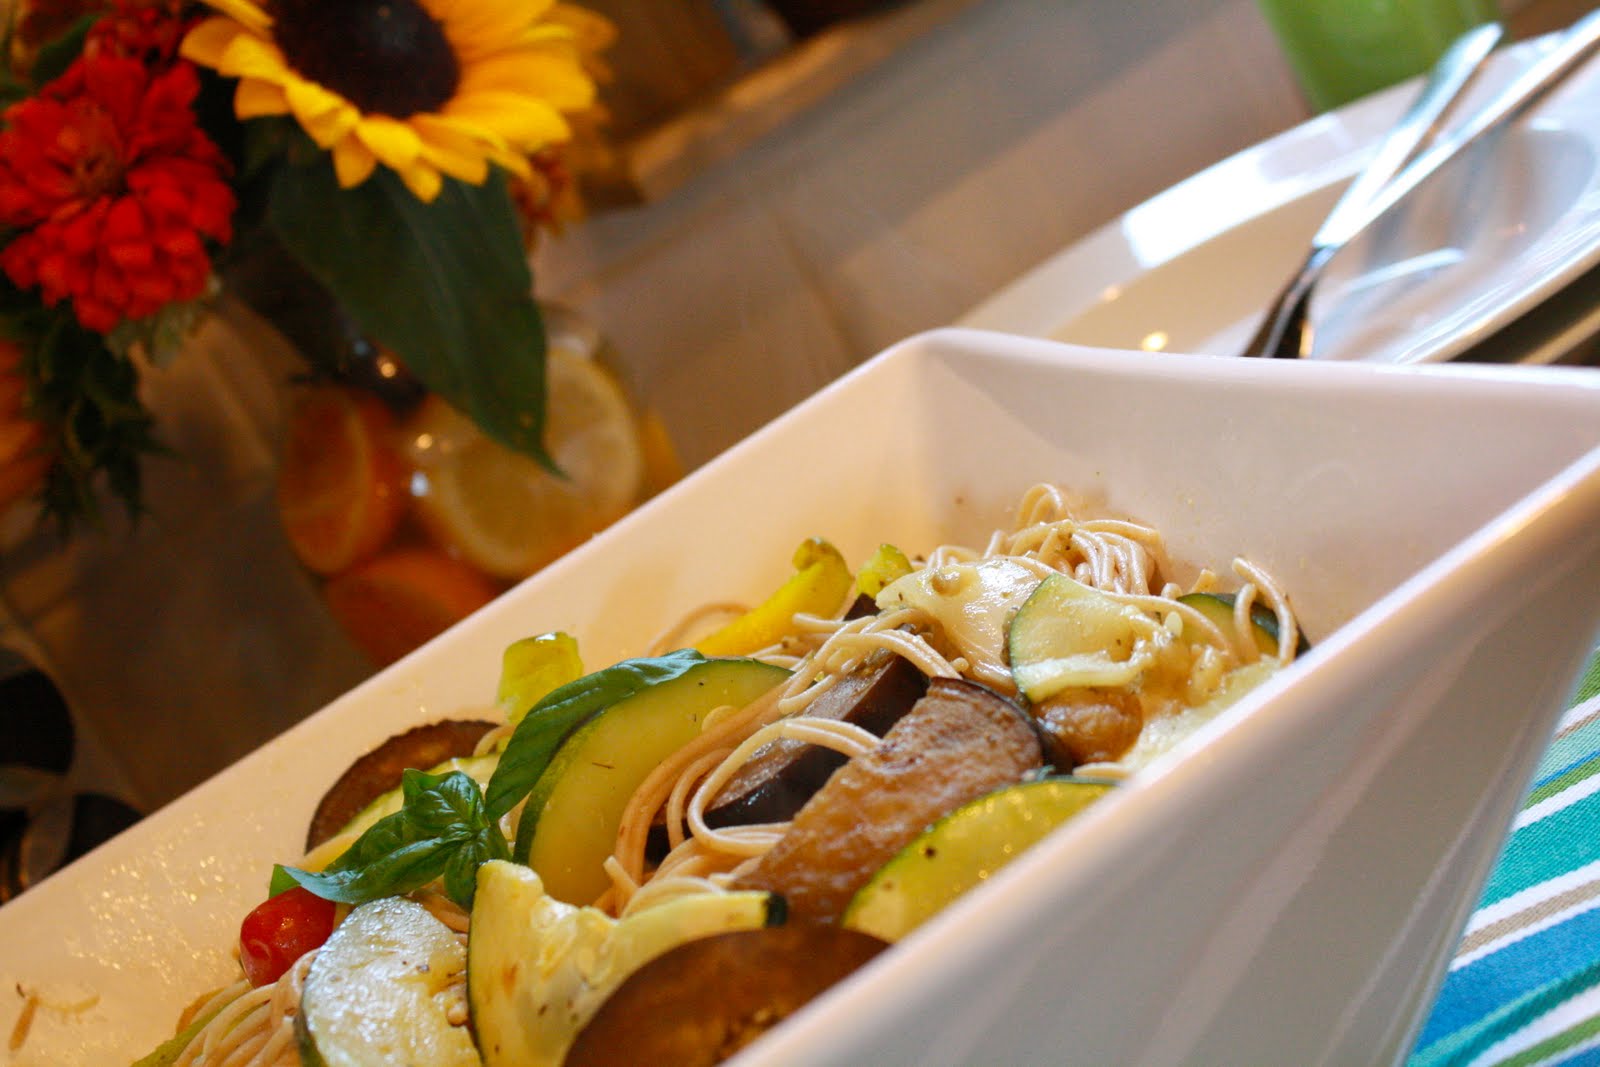
We served flatbread pizzas for dinner -- super simple and super tasty! Our friends, Gary and Alyssa, first made these at Gourmet Night and we've been in love ever since. My sister-in-law, Alexia, has since made them along with my parents.

Ingredients ::
~ Naan flatbread
~ Whatever toppings you want

**Just to give you some ideas, we made some white pizzas and some red. They were all different, and we sliced and shared them so that everyone could sample the various kinds. For the white pizzas, I spread a little EVOO on the Naan first. Then I added my base which consisted of thinly sliced zucchini, onions, peppers and garlic sauteed in EVOO {I had this ready before I started creating the pizzas}. Then we layered on sliced tomato, fresh mozzarella, and some fresh basil. Other toppings were shredded mozzarella cheese, sliced pepperoni, red onion, etc. You just build your pizza to your liking.

Directions ::
1. After pizza is layered with toppings of your choice, pop in the oven for approximately 15 minutes or until cheese is hot and bubbly.
2. Slice, serve and enjoy!

**We made a big green salad to pair with our pizzas too.


......................................................................


I took almost 1000 pictures while in OBX and had to do some major narrowing down to say the least. My family teamed up to take some family pics on the beach one night, and here are just a few of my favs. Shades of coral was what I suggested we all wear, and I love the way all the colors look together. My aunt and cousin's wife helped us with the pics -- Aunt L. helped get the kiddies to look at the camera and K. took the pics -- thank you both!

**We were missing my sister's hubby as he was working all week {as one of JMU's football coaches, he couldn't escape -- they are in the thick of training camp in August} :-{


I tried as best I could to recreate some of the poses I collected on Pinterest. This one turned out better than I imagined -- I figured baby boy would be running off in any direction he could, but miraculously, he STAYED put! Those little ones are so unpredictable sometimes ;-}

**This week looks like it's going to be beautiful {at least in NJ} -- ENJOY!

Tuesday, August 16, 2011

{Recipes} Summer Pasta


My garden is currently out.of.control and producing crazy amounts of vegetables. With that being said, most of my meals have consisted of our garden veggies over the last few weeks. This little recipe is one of my old favorites -- it's a light, sauceless pasta meal stocked with your favorite summer veggies.

**Recipe by Tyler Florence of the Food Network

Ingredients ::
~ 1 zucchini, thinly sliced
~ 1 eggplant, thinly sliced
~ 1 pepper, cut in strips
~ 1 pint cherry tomatoes
***You can use whatever veggies you like in this dish***
~ 1/2 onion, finely chopped
~ 1 garlic clover, chopped
~ 1 tbsp oregano
~ 1/2 cup EVOO
~ S & P
~ 1 lb spaghetti
~ Arugula leaves, a handful {I subbed fresh basil for arugula b/c I didn't have any on hand}
~ 3/4 cup grated Parmesan cheese {plus more for serving at the table}

Directions ::
1. Boil a pot of salted water for spaghetti & preheat oven to 400 degrees.
2. Combine veggies, garlic and oregano in a bowl. Add oil, sprinkle with S & P, and toss.
3. Place vegetable mixture on a baking sheet and roast for 15-20 minutes or until veggies are carmelized. Scrape into a large bowl and cover to keep warm.
4. Cook pasta 8-9 minutes {until al dente}.
5. Reserve 1/4 cup of pasta water and stir it into the bowl of vegetables.
6. Add pasta, arugula, cheese and more pepper to bowl; toss and serve.

ENJOY!


I served this meal with crusty bread. TIP :: I love a slice of good bread with a pasta meal so when I buy a fresh loaf, I quarter it. One quarter is sliced and served with my meal. The other three quarters are separately wrapped in foil and frozen for the next time I serve a pasta meal or one that pairs well with bread. It keeps us from wasting the other half or more that goes uneaten, prevents us from going overboard on the carbs, and it's just nice to not have to run to the store every time my craving for bread strikes!

Thursday, August 11, 2011

{Recipes} Popsicles


I have been making homemade popsicles this summer for my son. They are such a great, little treat for him when we play outside on those hot, summer afternoons. I found popsicle molds this spring in Target's dollar bins {Dollar Stores also carry them} and from pudding pops to jello pops, those babies have gotten some great use. I made raspberry flavored pops yesterday and wanted to add some real raspberries in the molds except that my local grocery was sold out of them :-{ Recipe here.

Rainbow pudding pops have been on my list, but I haven't quite gotten to them yet ;-} Before summer ends....

**I had a massage yesterday afternoon -- O.M.G. I'm not a regular "massage getter" but I think I might become one after yesterday! Booked another for October -- ha!
**Trying to jam in all kinds of fun with my boyfriend before summer ends -- busy, busy, busy!
**Girls' Night tonight at a new restaurant. For my local readers -- review coming soon!

Monday, August 8, 2011

{Recipes} Apple Dessert Dip


I made this dip over the weekend and it's delish. I think kids would love this dip, too. And the apples make it healthy, right ;-}

Ingredients ::
~ 1 stick cream cheese, softened
~ 1 cup brown sugar
~ 1 tub caramel dip
~ Candy of your liking, chopped {I used Snickers}
~ Green apples, sliced

Directions ::
1. Mix the cream cheese, brown sugar and caramel dip together until soft and creamy.
2. Sprinkle chopped candy over dip and serve with sliced apples.

That's it -- so simple. Enjoy!


****************************************

One word for this weekend -- FABULOUS! Our friends, Gary & Alyssa, spent Saturday & Sunday with us at the shore, and we had a blast with them.


Alyssa had her camera on hand at Champagne Island and snapped so many beautiful pics of our son, our dog and our family. This is one of my favs -- XoXoX

Tuesday, August 2, 2011

{Recipes} Sundried Tomato & Basil Pasta


I love when it only takes 15 minutes to whip up a fabulous dinner for my family, don't you? Although I love to cook, especially for my little family, I do not like to be stuck in the kitchen for hours on end.

This little recipe is one my sis-in-law {Jane} gave me a few years ago when we were all swapping easy and yummy dinner recipes on vacation. I had forgotten all about it and found it in my recipe box the other day. Here it is ::

Ingredients ::
~ 1 lb. pasta noodles
~ 1 jar sundried tomatoes
~ 1 cup fresh basil
~ Garlic {a few cloves}
~ 1/2 cup parmesan cheese

Directions ::
1. In a food processor, blend the tomatoes, basil and garlic.
2. Cook pasta and save pasta water. Add some of the pasta water to the tomato mixture {a cup or so should do it}.
3. Pour tomato mixture over pasta, add some fresh basil for garnish, and sprinkle with the parmesan cheese. YUM!

**I love sundried tomatoes, so I used two jars {and approximately two cups pasta water}. It was delicious but very, very rich!
**This is one of those recipes that you can follow loosely -- if you love one of the ingredients, you can experiment by adding more {or less} than what's listed.
**I thought it would be yummy to add a little chicken to this dish too {although that increases the time spent in the kitchen so maybe not ;-}

---------------------------------------------


Dean loves to help me in the kitchen. He wants to be held so he can see everything going on on the stove and countertop when I'm cooking dinner. Last night, he was too funny when I turned on the blender {I don't have a food processor -- on my Xmas list this year}. His expression was priceless -- completely awestruck! And he stayed like that for a good 5 minutes or so while I was blending.


How sweet is the innocence of a child? It's the simplest things in life that mesmerize them -- and makes me take a step back and appreciate the little things that I so often take for granted.


I pulled one of our stools for Dean to sit on so he'd have a front row seat of the blender {and because at almost 27 pounds, he breaks my arm when I hold him for too long ;-}

Friday, July 29, 2011

{Recipes} Poppyseed Dressing


Last night was Girls' Night at my house, and part of my dinner menu consisted of a big, green salad with my mom's poppyseed dressing. Inspired by Panera Bread's strawberry poppyseed salad that we both love, my mom whipped up her own dressing recipe that has now become my favorite.

My mom made this for Dean's Little Mister Mustache Bash back in February, and I intended on sharing the recipe shortly after the party. Have I mentioned I can't remember anything since giving birth? It's true -- Dean definitely took some of his mama's brain cells when he entered this world. AHHH! So, better late than never -- this is a great dressing for anytime of the year, but especially yummy in the spring & summer because it's served with a strawberry salad {or doesn't have to be -- I didn't add them to my salad last night}.


My mom is hysterical with her recipes -- most of the time she doesn't really follow recipes, so when she shares her creations with me, the measurements always make me laugh {LOVE you Mommy!}.

Poppyseed Dressing ::

In a salad dressing cruet, add the following ::

~ 2 Tbsp lime juice
~ 1 tsp lime juice
~ 1/2 tsp salt
~ 2 1/2 Tbsp sugar {heaping Tbsp's as per my mom's instructions -- hehe}
~ 1/2 tsp dry mustard
~ 1 tsp finely diced onion
~ 1 Tbsp poppyseeds
~ 1/2 cup EVOO {canola oil works too}

**Shake all of these ingredients in the cruet

~ Lastly, add approximately 1/4 cup half & half {this is what make it creamy}

**Shake again and refrigerate until you are ready to serve

ENJOY!

*****************************************


Girls' Night was really fun! Full post coming on Monday!

Here's a quick peek at my signature cocktail for the night -- a spiked watermelon slushy! Stay tuned for more of the juicy details and lots of yummy recipes!

**TGIF!

Thursday, June 30, 2011

{Recipes} Zucchini Bread & Wrapping


Our garden has kicked into high gear, and we have zucchini galore. What's a girl to do with all these wonderful summer veggies? Make zucchini bread, that's what. It was a great way to eat up some of the extra I have lying around not to mention a yummy treat! I'm heading to a girlfriend's house for a coffee date this morning and will be bringing some of this zucchini bread for us to enjoy.

I love creative presentation of food, gifts, mail, anything and everything. I thought this would be a great opportunity to try a creative wrap idea. All I did was use some kraft paper {a brown bag would probably work too}, wrote the recipe out in black Sharpie marker, wrapped it around the zucchini bread, and tied some yarn {twine would be cute too} around the middle to hold everything in place.

How cute would this be around the holidays for those that enjoy baking and giving edible gifts to neighbors, co-workers, etc? This idea would work with cookies too. How about as a favor for guests to take home at a baking party or any party for that matter? Hmmm....ideas, ideas, ideas!

**Zucchini bread recipe -- here.
**Love creative wrapping like me? Check out my Pretty Packaging pinboard with all kinds of cute gift wrapping inspiration!
**Other pinboards I've created and posted ::
-------Fourth of July Flair {looking for last minute ideas for the 4th? Check it out!}
-------Rainbowy Fun {So many bright & cheery ideas!}
-------Coral & Gray {A hot color combo right now and perfect for summer}

Thursday, June 23, 2011

{Recipes} Summer Veggie Wraps

There is nothing to this meal -- I was able to make it in no time, and the clean-up was just as simple. All I did was roast some veggies from my garden and arrange them in a wrap. SO EASY & HEALTHY and a quick summertime meal!

Ingredients:
~ Whole wheat wraps {or wraps of your choice}
~ Summer veggies {I used eggplant, zucchini, tomatoes, onion & pepper}
~ Gorgonzola cheese, crumbled
~ Balsalmic dressing

Directions:
~ Cut your veggies and arrange on a baking tray. Drizzle with a little EVOO and season with a little S & P. Roast on 350 degrees for approximately 20-25 minutes.
~Arrange veggies in wrap {I like to heat these in the oven for a few minutes so they're warm for eating}. Add a little gorgonzola cheese and drizzle with balsalmic dressing.
~ENJOY!

Tuesday, June 14, 2011

{Recipes} Stuffed Zucchini


One of my favorite parts of the warm weather is the fresh summer veggies, and I always find myself spending a small fortune at local farmers' markets because I serve either zucchini, squash, eggplant, tomatoes, or corn with almost every meal. Enough is enough! Bo decided to give our garden another go this summer {he planted a garden the first summer after we bought our home and Ginger destroyed it -- she was only 3 months old at the time and a very energetic pup}. This time he did his planting on the other side of the fence, and we've already gotten some huge zucchini. Pretty soon there will be corn, tomatoes, peppers, eggplant, and pumpkins {for the fall!}.

**Notice baby boy ripping down the little fence my husband put up. What can I say? If it's not Ginger, it's Dean!


Tonight for dinner, we used some of our homegrown veggies and made "stuffed zucchini." I made these almost exactly like I make stuffed peppers. Here's what I did:

Ingredients:
~ 2-3 nice sized zucchini
~ 1 pound lean ground beef
~ 1/2 onion, diced
~ S & P | EVOO
~ 1/2 - 3/4 cup salsa {a can of tomato sauce would work too}
~ shredded cheddar cheese
~ 1 packet Success rice {I used brown rice}

Directions:
1. Cut zucchini in half lengthwise. Hollow out middle {I saved the hollowed out zucchini, cubed it, and added it to my ground beef mixture}.
2. Place zucchini on a baking sheet and pour a little EVOO over them. Then sprinkle with S & P.
3. Place in oven for approximately 20 minutes {or until zucchini are just about roasted}.
4. While zucchini are roasting, cook rice according to directions on the box.
5. Then brown ground beef, onion and remaining zucchini cubes in a skillet on the stove.
5. Drain fat, add salsa, a little cheese, and rice to beef mixture.
6. Scoop beef mixture into hollowed out zucchini and top with some more cheese.
7. Place back in the oven for about 5 minutes {or until cheese is melted}.
8. Enjoy!

**I served my stuffed zucchini with corn on the cob and sliced tomatoes -- YUM!!

*****************************************
Changing subjects...


Baby Lifestyles just released a brand new online magazine yesterday, and it's gorgeous! As I was flipping through, I spotted one of the pics I took from Dean's Little Mister Mustache Bash {Baby Lifestyles also featured his party in March}. It's a tiny picture, but it's still exciting to see something that you put a lot of hard work into being used to inspire others!

Thank you for including me in your spread, Baby Lifestyles!

To see a full screen view of the pic from Dean's party {it's his mustache party hat I made!}, click HERE.

To check out the entire magazine, click HERE.

Thursday, April 28, 2011

{Recipes} Pineapple Casserole

Great little side dish for you! This is another signature recipe a la my girlfriend Patty {actually her wonderful cook for a mother deserves the credit here ;-} Thank you, Mrs. Q!


I made this for Easter dinner at my mom's house, and then again the very next night for our dinner at home! I love this casserole paired with pork sandwiches -- so yummy!

Ingredients:
~ 1 cup sugar
~ 1/2 cup butter {1 stick}, softened
~ 4 eggs
~ 1 cup crushed pineapple, drained
~ 5 slices cinnamon raisin bread, cubed

Directions:
~ Cream the sugar and butter
~ Beat in one egg at a time
~ Add pineapple and then fold in cubed bread
~ Spread in a greased casserole dish
~ Bake at 350 degrees for 1 hour
~ ENJOY!

**You can add in a little sprinkle of cinnamon & some extra raisins if desired.
**I doubled this recipe to fill a 9x13 sized casserole dish.
**It almost could pass for a dessert it's so TASTY!

Thursday, April 14, 2011

{Recipes & Royals} How's This For a Combo -- Tater Tot Casserole & The Royal Wedding


I made this Tater Tot Casserole last night for my family {recipe compliments of Hungry Girl}. I get a daily e-mail newsletter from Hungry Girl with recipes, tips and tricks for healthy eating, and great substitutes for some of your "unhealthy" favorites {you can sign up for this on their website}. In addition, all of the caloric stats are listed with each recipe, which is nice to know if you're watching the ole' waistline.

Ingredients:
~ 2 cups sliced mushrooms
~ 1 cup chopped onion
~ 3 cups frozen chopped spinach
~ 2 cups frozen bite-sized mixed veggies
~ 2 cups frozen ground-beef-style soy crumbles {like the kind by Boca or Morningstar Farms}
**I subbed lean ground beef for the soy crumbles**
~ 1 cup frozen shelled edamame
~ 1 tsp. chopped garlic
~ One 10.75-oz. can 98% fat-free cream of mushroom condensed soup
~ 36 frozen Ore-Ida Tater Tots (about 3 cups)
~ S&P

Directions:
1. Preheat oven to 375 degrees.
2. Bring a skillet sprayed with nonstick spray to medium-high heat on the stove. Add mushrooms and onion. Stirring occasionally, cook until softened, about 6 minutes. Set aside.
3. Meanwhile, place frozen spinach, mixed veggies, soy crumbles, and edamame in a large microwave-safe bowl. Cover and microwave for 5 minutes. Uncover and stir. Cover and microwave for 3 more minutes, or until thawed.
**If subbing ground beef for soy crumbles, just brown the beef, drain the fat and add to the veggies once done.
4. Once cool enough to handle, drain any excess water from the bowl. Add mushroom-onion mixture and garlic, and mix well. Add condensed soup, and toss until ingredients are thoroughly coated.
5. Spray an 8" X 8" baking pan with nonstick spray, and evenly spoon mixture into the pan, smoothing the surface with the back of a spoon. Evenly lay Tater Tots on top in a single layer.
6. Bake in the oven until entire casserole is hot and the top is crispy {about 35 minutes}. Serve it up and, if you like, season to taste with salt and pepper.

**I served this casserole with applesauce. It's really good, but I would say you must be a fan of veggies to like this -- definitely a vegetabley taste!

ENJOY!

*****************************************


I'll admit it -- I'm excited beyond belief to see Prince William marry Kate Middleton at Westminster Abbey this month.

There is something about this couple that just fascinates me. Maybe it's the fact that the future King of England is marrying a "commoner." Maybe it's the oh-so-proper and distinguished British accent {exhausting by the way - I have long ago childhood memories of pretending to be British -- ha!}. Maybe it's the fact that my own mother set her alarm clock for 2am on the morning Prince Charles wed Diana. Or perhaps it's that I can't wait to see Kate's gown, the flowers, and all the wedding day details!

I guess I can't put my finger on exactly what I love so much about this couple, but I know I'll be watching that tv at some ungodly hour on April 29, 2011! Are you joining me?